
Use this checklist after completing quick onboarding: Scan → Business → Goals → Content → Alerts → Launch.
Launch Chatbot completes the bot’s setup; it does not install the widget on your website. Check the training, branding, alerts, and real website experience below before directing visitors to it. For screenshots of each onboarding stage, see Smart Setup.
Screenshots below show the UpChat example bot in a staging workspace. Your content, totals, and available features may differ. Always copy the installation code from your own production bot.
Before you launch
1. Check your training content
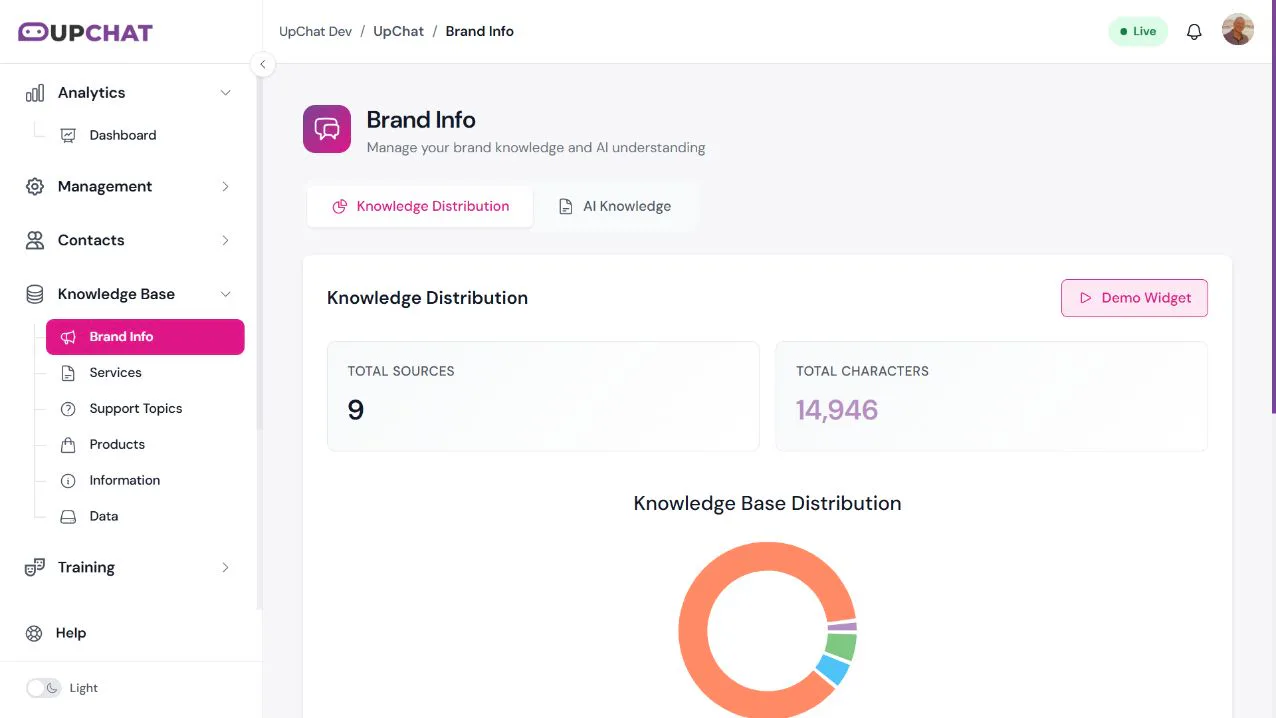
Open Knowledge Base → Brand Info for an overview of your sources. Review the services, products, FAQs, and business information your bot will use. If you ran Smart Setup, check the imported content for accuracy and fill any gaps with manual training.
Ready when: your key services, service areas, contact information, and common answers are current. Source counts alone do not confirm that the answers are correct.
2. Review your widget appearance
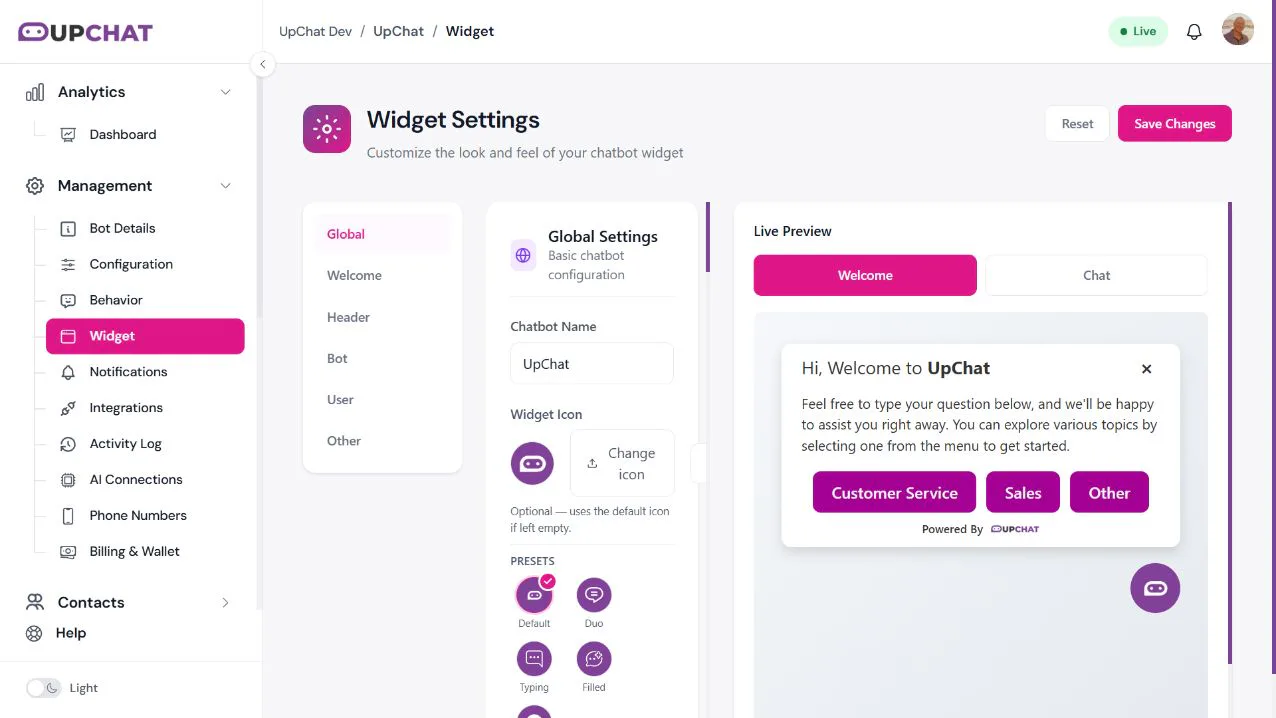
Open Management → Widget. Check the widget icon, header, and message colors against your website. Use both Welcome and Chat in Live Preview, and save any changes you make.
Ready when: your branding is recognizable and the text is easy to read. See Customizing Your Widget for more detail.
3. Make your greeting useful
In Management → Widget → Welcome, review the Welcome Message and Welcome Pills. Use a short greeting that explains how the bot can help. Add a few conversation starters that reflect real visitor needs, such as Sales, Customer Service, or Get a Quote.
Ready when: visitors can tell what to do next and every starter matches a topic your bot can handle. Save your changes. Learn more about welcome messages and conversation starters.
4. Test the conversation before deployment
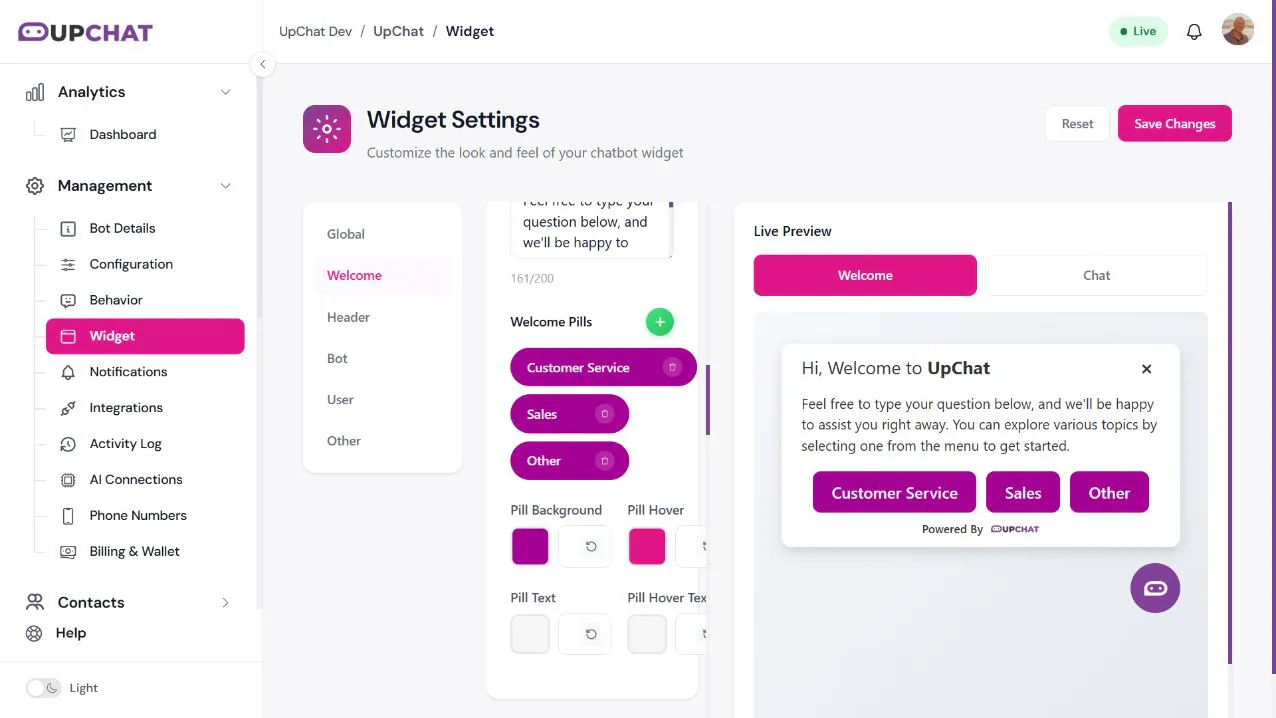
Open Training → Demo and test your live model. Ask your 5–10 most common questions, try the conversation starters, and check any links the bot provides. Use the desktop and mobile views to review both layouts.
Ready when: answers are accurate, useful, and consistent with your business. Correct missing information and test again. The Demo screen runs in sandbox mode and excludes test conversations from analytics; it is not a delivery test for your live lead alerts.
See How to Demo Your UpChat Bot Before Deployment.
5. Confirm who receives lead alerts
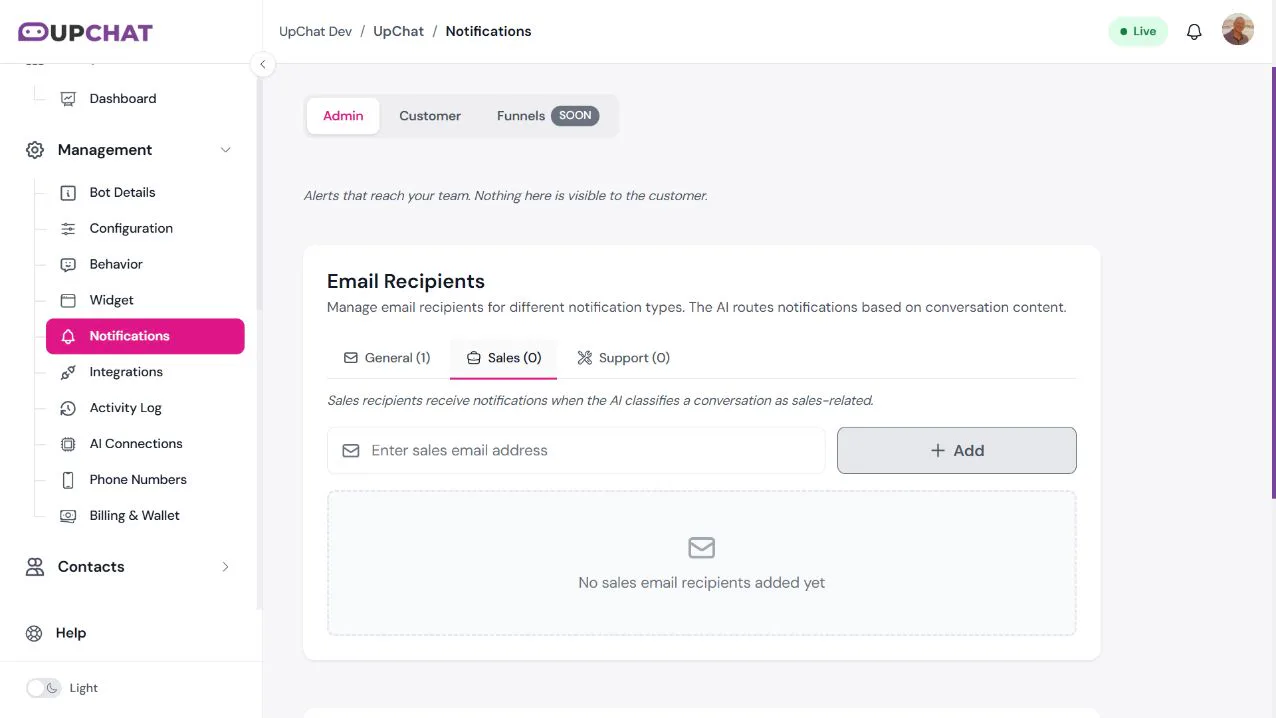
Open Management → Notifications → Admin. Review your General, Sales, and Support email recipients. General recipients receive all lead notifications and conversation summaries; Sales and Support routing depends on how the conversation is classified.
Ready when: the right teammates are listed and someone is responsible for following up. Check the available in-app notification options too. The screenshot shows an empty Sales list as an example; enter your own team’s addresses.
6. Get the correct installation code
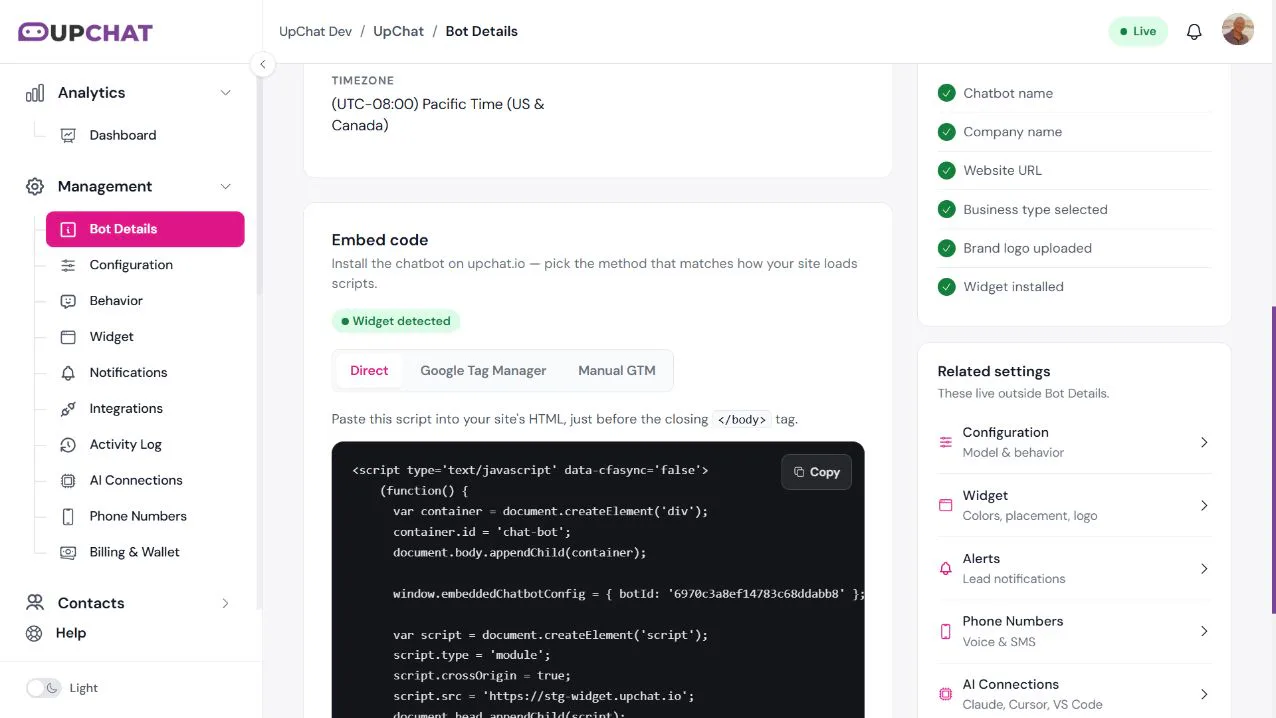
Open Management → Bot Details and scroll to Embed code. Choose the method that matches your website: Direct, Google Tag Manager, or Manual GTM. For Direct installation, use Copy and place the snippet just before the closing </body> tag on the pages where you want the widget.
Ready when: you have access to publish your site or tag manager and have copied the snippet from the correct production bot. Do not copy the staging code shown in this screenshot. Follow Installing Your Widget for the installation steps.
Launch
- Install and publish. Add your production bot’s snippet using the method you selected. Publish the website changes or your tag manager container.
- Check the real website. Open a published page, refresh it, and look for the widget. Open it and ask a common question. Repeat on a phone and on other pages where the widget should appear.
- Check lead delivery. Run a clearly labeled test with contact details you control. Confirm the lead is captured and the intended team receives the expected alert. A sandbox Demo test does not verify this live delivery.
- Review installation status. Return to Bot Details and review the Setup checklist and any Widget detected status. Use the actual website test as your final confirmation.
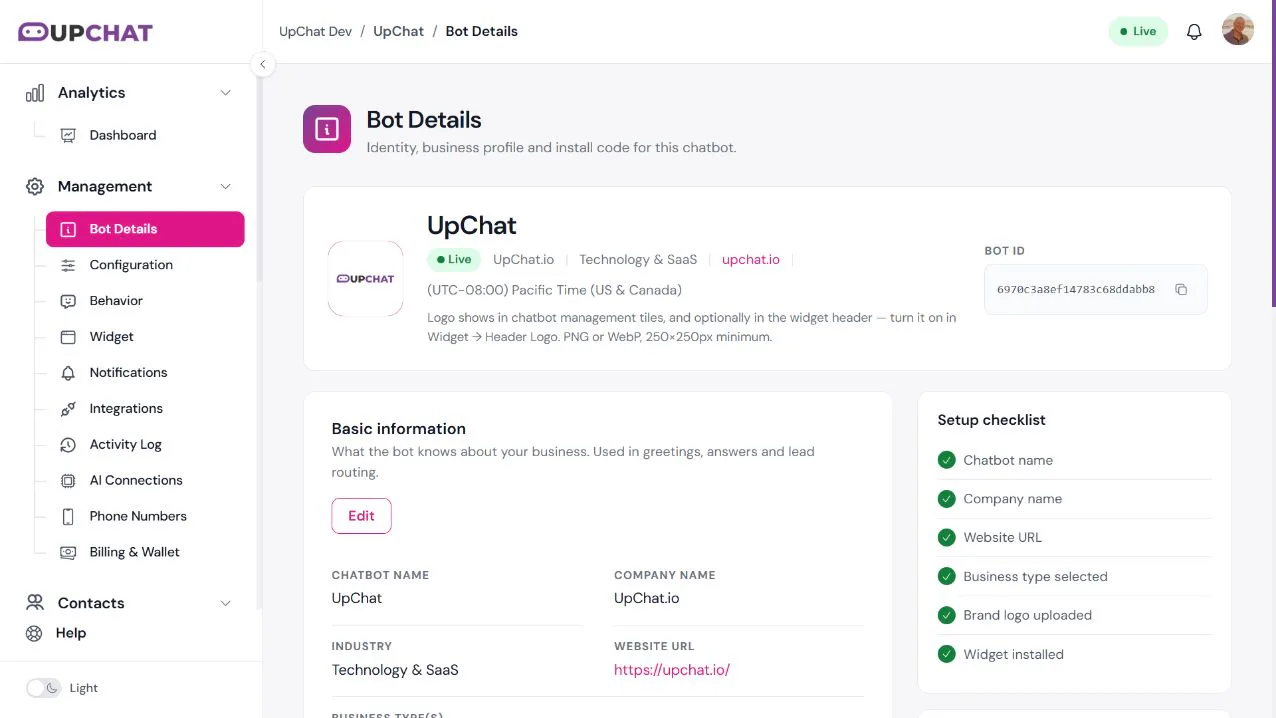
If the widget does not appear, check that the correct snippet was published on that page. See Installing Your Widget for help.
Right after launch
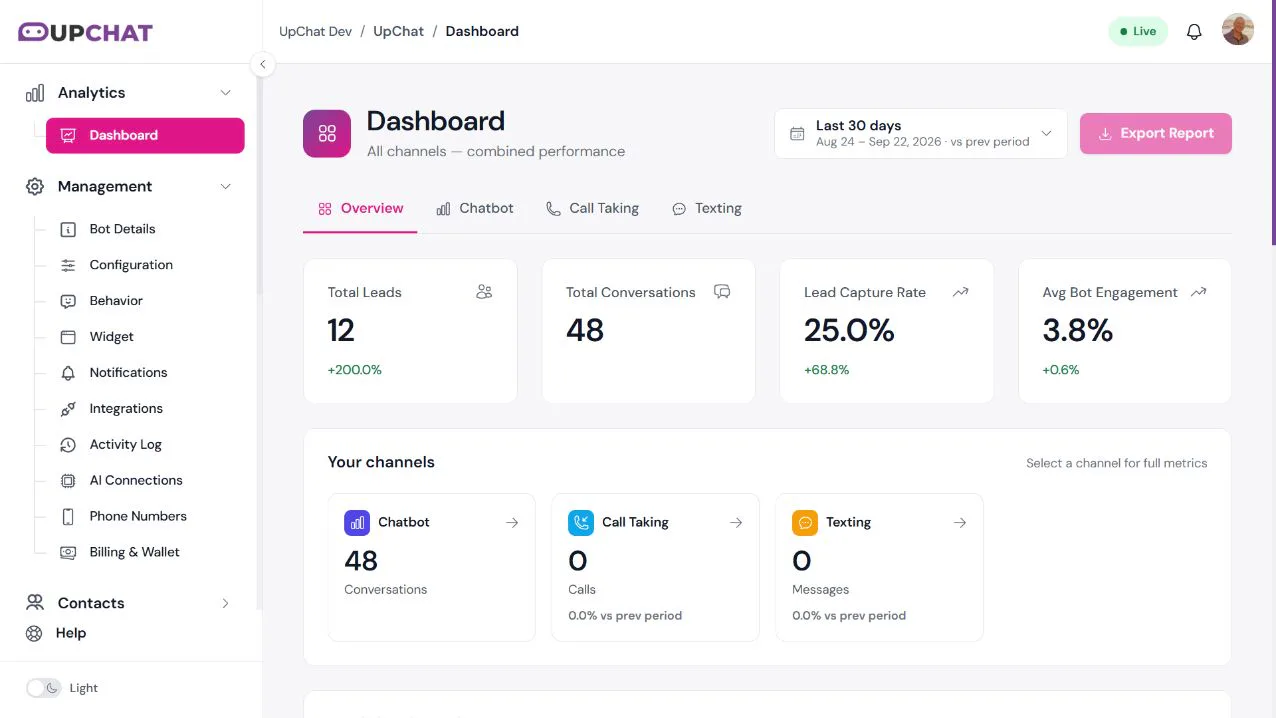
- Monitor activity. Open Analytics → Dashboard and choose a relevant date range. Review conversations and captured leads as visitors begin using the widget.
- Follow up on leads. Open Contacts → Leads, review new enquiries, and make sure the responsible teammate responds.
- Improve the answers. Review available conversation details, add or correct training content for questions the bot missed, and retest in Training → Demo.
Your launch check is complete when the widget works on your published site, answers your test questions correctly, and routes captured leads to the right people.
Need a hand?
If a check fails, submit a ticket with your bot name, the affected page URL, and a description of what you expected and what happened. You can also browse the Help Center.