
Add the UpChat snippet to a standard WordPress site with a site-wide header and footer tool. These steps use WPCode – Insert Headers and Footers. They do not use Elementor.
Using Elementor? Follow How to Install My Chatbot in WordPress Elementor. Using Webflow? Follow Install UpChat on Webflow.
Step 1 — Copy your UpChat installation code
- Sign in to your production UpChat account and open the bot you want on the site.
- Go to Management → Bot Details.
- Scroll to Embed code and select Direct.
- Select Copy.
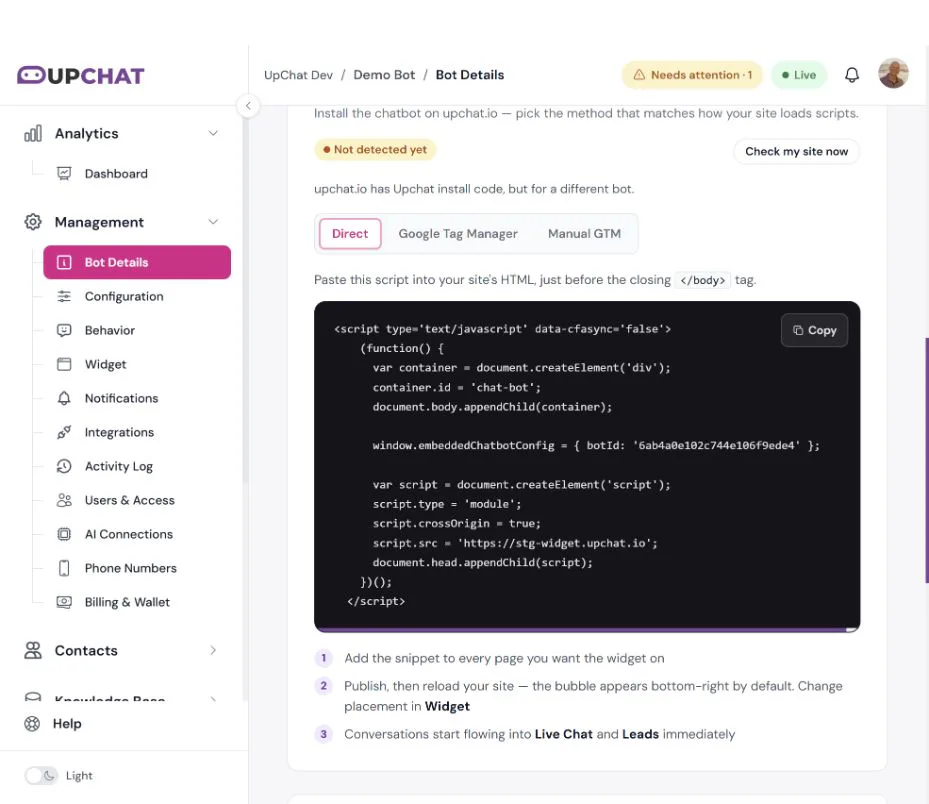
Use the code copied from your own production bot. The screenshot uses Demo Bot on staging; its bot ID and staging widget address are examples, not code to copy into a customer website.
Step 2 — Add the snippet in WordPress
- In WordPress administration, install and activate WPCode – Insert Headers and Footers if it is not already available and you are allowed to install plugins.
- Open Code Snippets → Header & Footer.
- Paste the full UpChat snippet into Footer.
- Select Save Changes.
- Clear any page cache and test the public site while signed out of WordPress.
Do not add a second snippet if your theme or another plugin already installs UpChat. For WordPress.com, check that your plan supports the required plugins and code; a free site may restrict JavaScript. See WordPress’s header and footer code instructions and code restrictions.
Verify the installation
Open the published site in a normal browser tab, open the widget, and send a test question. Check at least the home page, a second page, and a phone-sized view.
Back in Bot Details, select Check my site now. If UpChat reports that the website has code for a different bot, compare the installed bot ID with the code you just copied.
For a missing widget, see Troubleshooting: Your Widget Is Not Showing. Publish your site changes before relying on a preview result, and avoid installing the snippet twice through different methods.